Wednesday 15 January 2014

final pose position for low and high poly characters


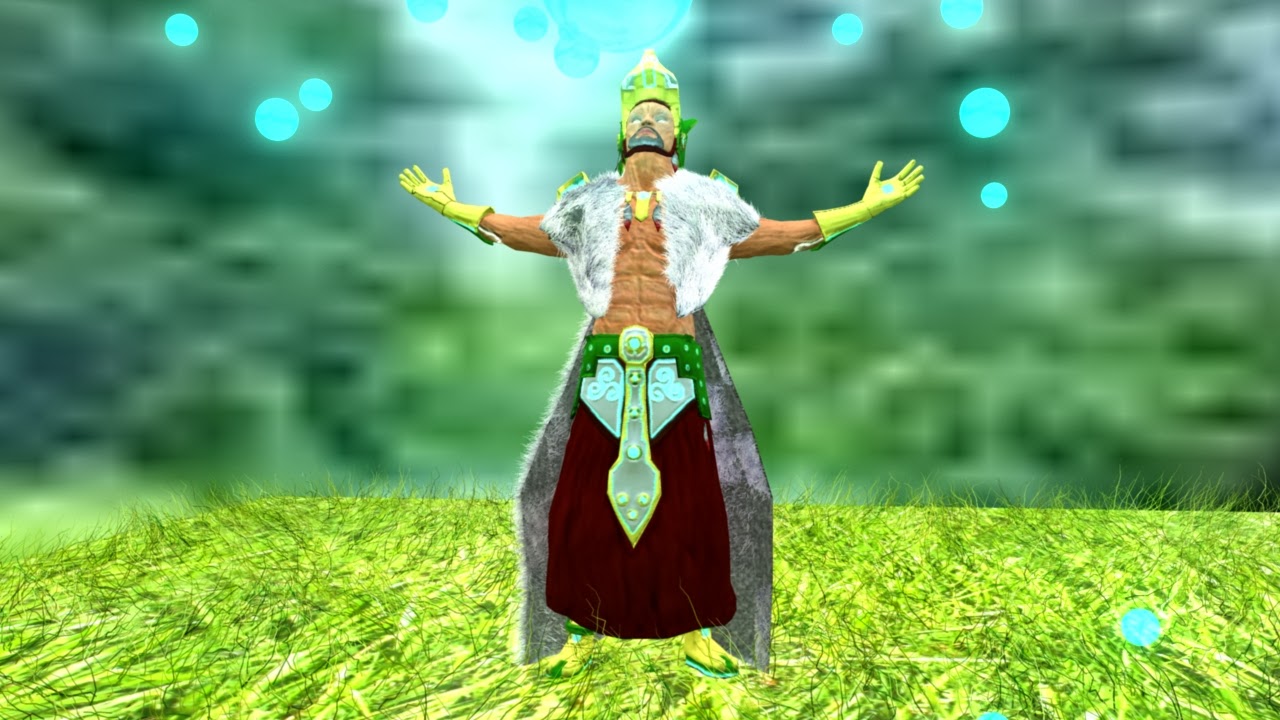
Final front look of High poly character


front of low poly character


In my opinion I feel like I have achieved creating a Futuristic and peaceful character meeting up all the requirements such as the texture memory footprint and producing two models one high poly character consisting no more than 10,000 tris and a low character consisting of 2000 tris.

Even though I had filled the requirements I felt that the mapping process of my models could have been a lot better as I am still not happy with them. maybe an ambient occlusion map over the color map may have helped instead of the cavity map.

I also think I had over complicated my mesh resulting in certain errors during the early process which had an effect on my modelling later down the pipeline process.

Here is a link showing my high and low models on a posed turn table.


Tuesday 14 January 2014

Basic rigging of both high and low poly models


Rigging

Here are a series of screen shots displaying me create a basic rig and posing my model. To create the rig I followed a tutorial in digital explaining how to create a basic rig for posing purposes which I am trying to achieve.

I was actually dreading creating a rig for the model but after watching this tutorial I didn’t find it that bad in fact it was a really good tutorial breaking down how to create a basic rig. During this process I learnt how to;

-          -Create a basic joint skeleton.
-          -Basics of skinning a character.
-          -Fixing of ik solvers and handles.
-          -Parenting joints.
-          -Parenting basic controllers
-          -Distributing and colouring weights to show how much a joint effects the mesh.

With this leant I was able to pose my character.

low poly rig creation


high poly rig creation


Thursday 9 January 2014

finished low poly model


This is the finished results I could get for my low poly model I wasn't happy with the uv layout as I was not able to produce the quality that I wanted. When exporting the colour and detail out of the high resolution failed I tried to fix it up in Photoshop to try and take the bad edge of the model.

Overall I am not pleased with this result I wish I had discovered this flaw a long time ago. Even though I had followed the tutorials and the pipeline for how to create a poly model from z brush I still ended up with a bad model.

Overall I think it goes back to design. If I had made a simpler or smoother model I think I would have had a different and perhaps better Uv map layout. 


Tuesday 7 January 2014

low poly mapping


Following the same process on creating the high poly I first unwrapped the model hoping to give the appropriate uv space again I think if I had made a better model for the helmet I would not be faced with cramping uvs into an acceptable space.


From here I exported the finished uvd obj’s into topogun were I extracted the maps with my new topology. just like I did with the high poly version.

as I am working through this I can see this pipeline being really effective and can be applied to all high and low poly models.


Sunday 5 January 2014

low poly model


Moving onto creating the low poly character which is aimed for mobile devices the goal is to create a texture memory foot print of 1024x1024 and a poly limit of 2000 tris. With the difficulty of finishing the high poly model I had another difficult task to create a low poly model.

The approach that I took was to use my high poly model and try to reduce the poly count by deleting edges, retapolgizing the mesh and try to put the polys in the appropriate place to still look similar to the design.

The helmet again caused a major issue as it took up a lot of polys. I also had to recreate the belt and simplify the shoes to achieve a low poly model. Through this process I managed to reduce the polys in every piece of armour giving me an overall poly count of 2000 tri

I think this was a successful process and a lot easier than reducing a 10,000 poly model to a 2000 model instead of millions of polys to 10,000.


Saturday 4 January 2014

renders of high quality model


Eventually I had a big step forward and learnt where the emissive file is set. By opening up the hypershade and selecting the shader with your maps. In the colour section the input called Incandescence is where the emissive map would be placed as I later learnt it means emission of light

And from this I was able to finish my model in Maya by applying a fur material on the jacket and cape.

 Here is the final result of my high quality model.


Friday 3 January 2014

fur failure


An attempt to create fur with the remaining polys I had left. I tried following this online tutorial to try and create a fur to export into marmoset tool bag. But in the end I wasted time and effort as I hit the poly limit for my model.


It also did not render out nicely but still it was a nice technique to learn for future models.
Again in frustration I didn't know what to do to improve my high quality model. As I really wanted to make the glow appear more effective on my model. This was all cause by bad uv layouts of the model and perhaps bad topology as well.


Thursday 2 January 2014

placement of glow effect


This is the tutorial I used to teach me how to create a emissive map, sadly it didn't tell you where to insert the map in Maya as it was only talking about another program, Marmoset tool bag. It was designed for displaying models which I thought was ideal but I gave it a pass at first. So to experiment where the emissive file would plug in, I looked up some online information to find where this map was a meant to be placed. 


failed glowing effect 


After some frustration and lost hope I couldn’t find the input for the map as I thought it was placed in the glow special effects input in glow intensity.  I resorted to purchasing the program called marmoset tool bag and after purchasing this program I felt a little robbed as it didn’t have any fur texture materials within the program but it did have the emissive map placement.

Marmaset display renders.

side view

front view

The program might be sufficient for another model but for this model I didn’t think it presented well as I really wanted to try and get fur into the scene.